Creating Appointments
You can schedule appointments from the calendar or from a patient's profile. This guide walks you through the entire process.
How to open the appointment form
There are several ways to create a new appointment:
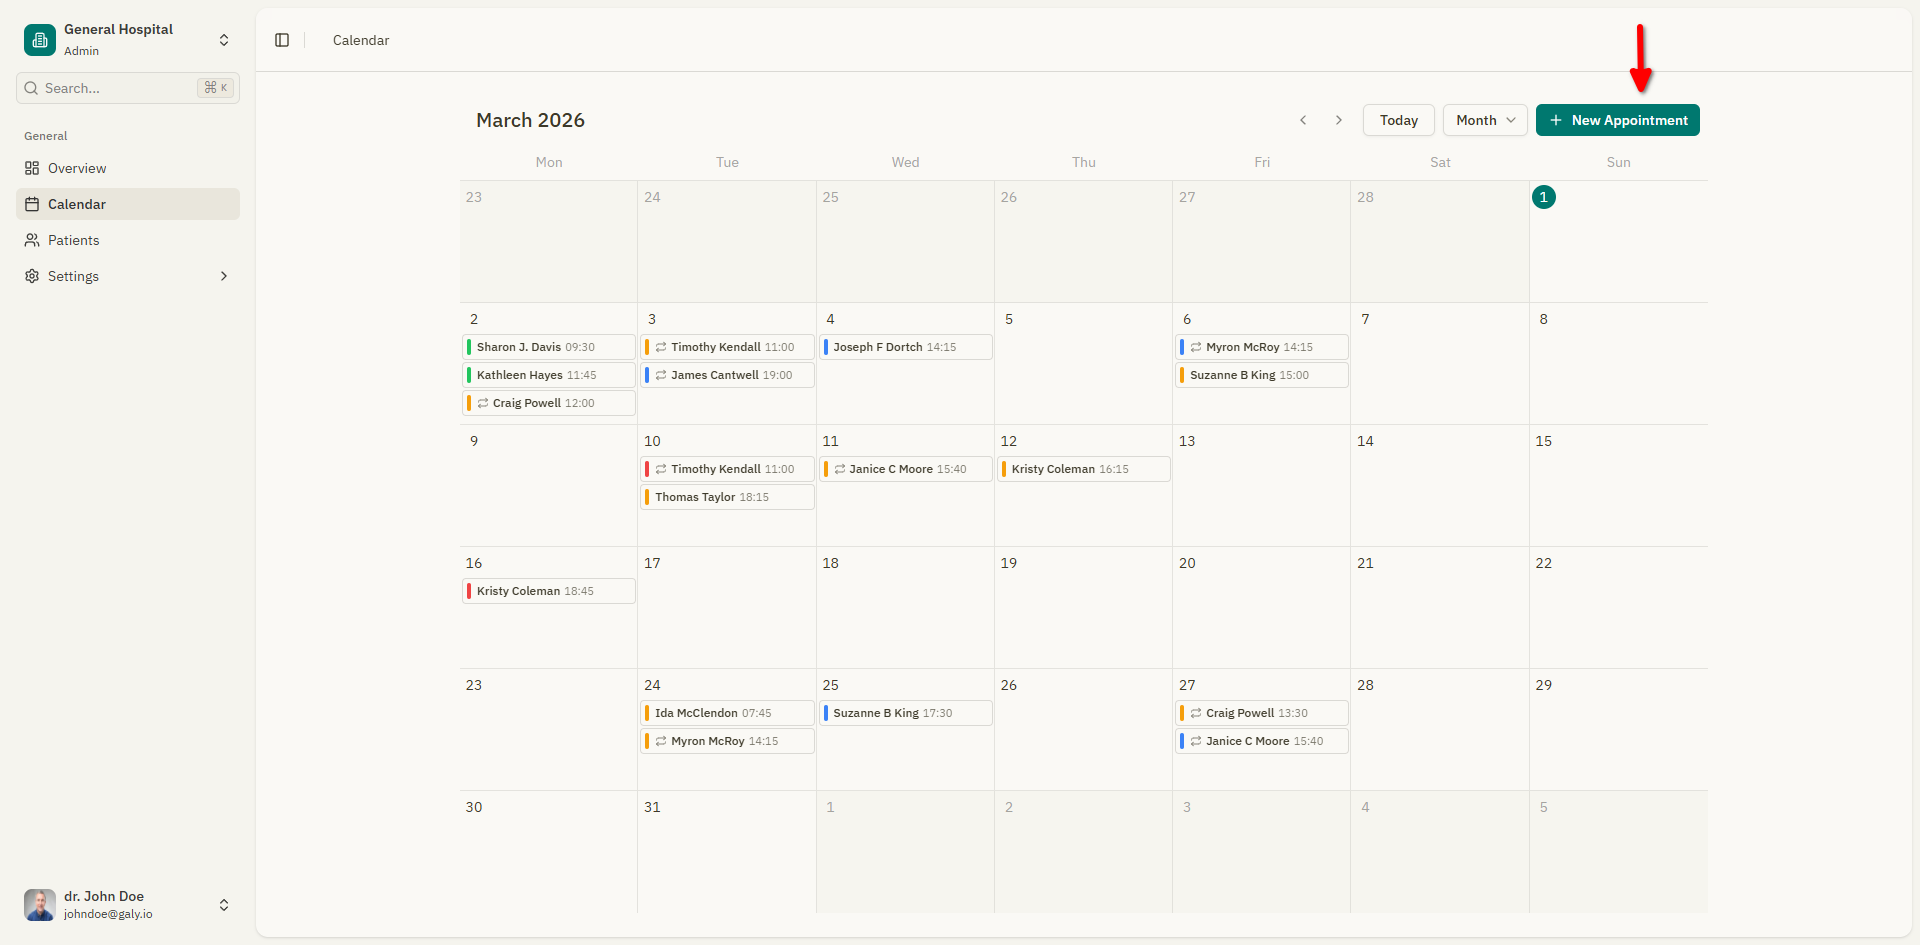
- From the calendar — Click the "New Appointment" button in the top-right corner of the calendar page.
- From a date — Click on an empty date or time slot in the calendar to pre-fill the date and time.
- From a patient's profile — Go to a patient's details page, open the Appointments tab, and click "Add Appointment".
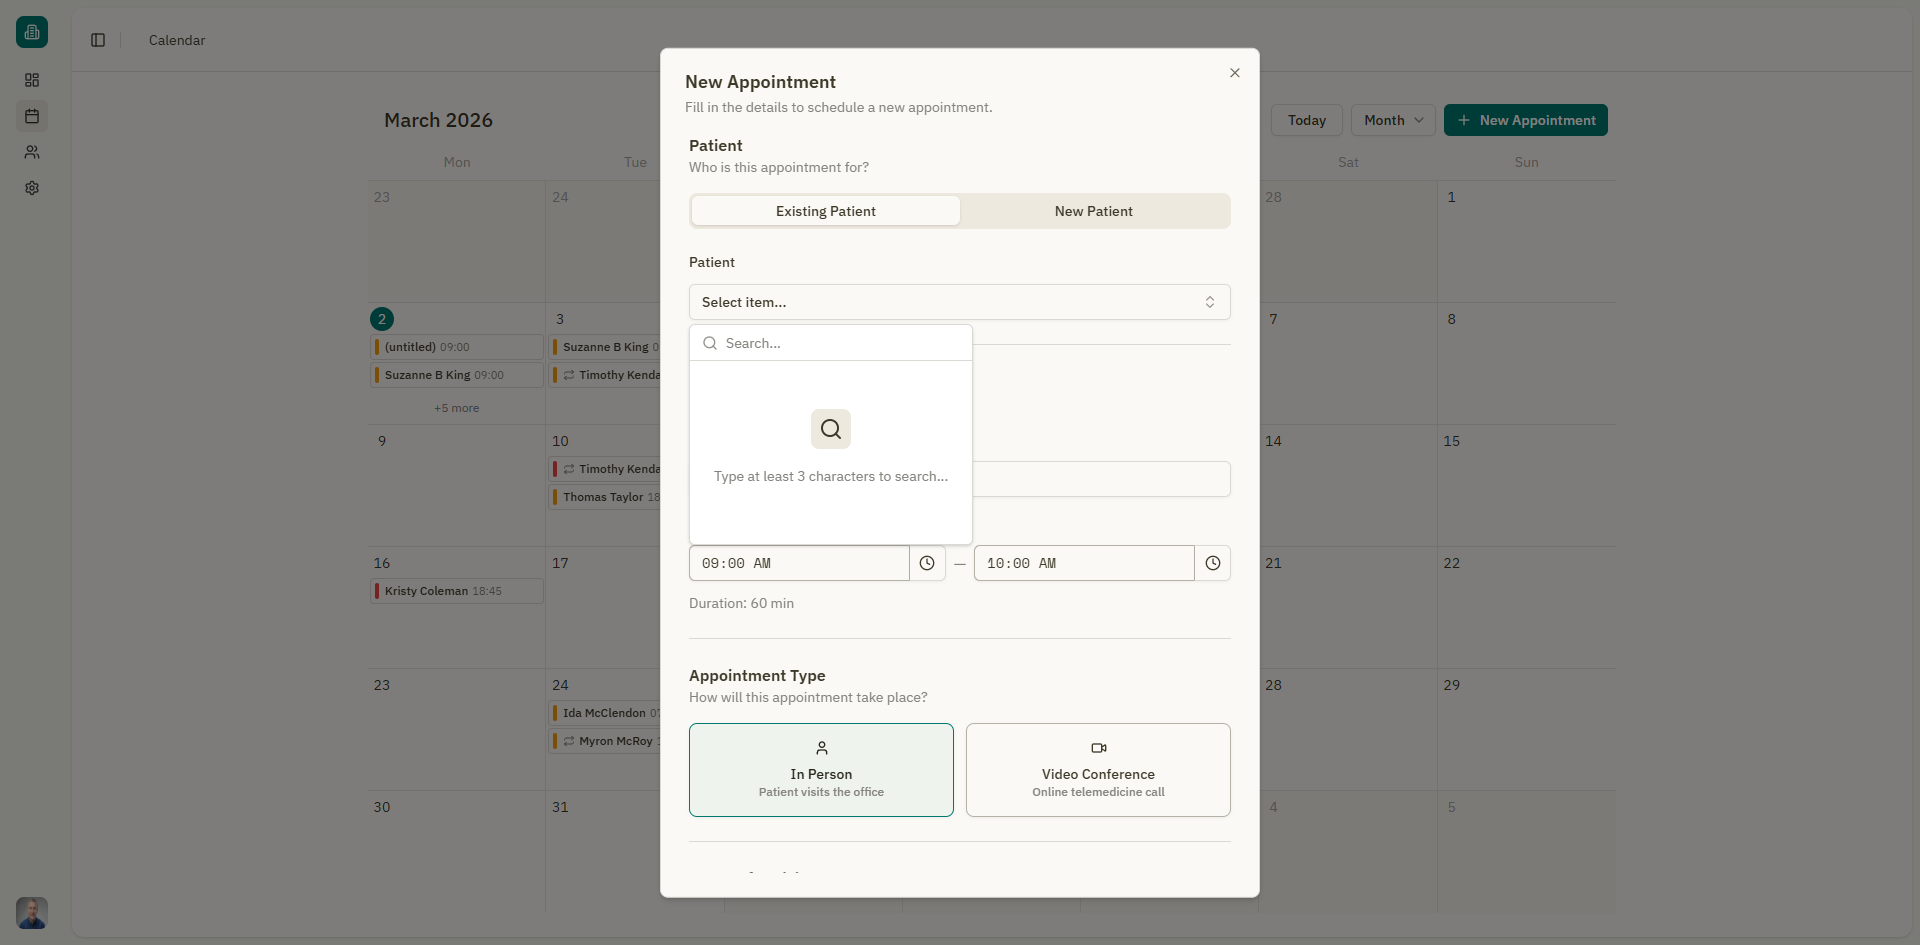
Step 1: Select a patient
The first section of the form asks: "Who is this appointment for?"
You have two options:
New patient
- Select "New Patient".
- Fill in the basic patient information:
- First name (required)
- Last name (required)
- DNI (ID number)
- Phone number

Existing patient
- Select "Existing Patient".
- Start typing the patient's name in the search field (type at least 3 characters).
- Select the patient from the results list.
When you create an appointment with a new patient, the patient record is automatically created in the system. You can add more details later from the patient details page.
Step 2: Set the date and time
In the "Date & Time" section:
- Date — Click the date field to open a calendar picker and select a date.
- Start Time — Select the appointment start time.
- End Time — Select the appointment end time.
The form displays the calculated duration (e.g., "Duration: 30 min").
The end time must be after the start time. The form will display a validation error if this is not the case.
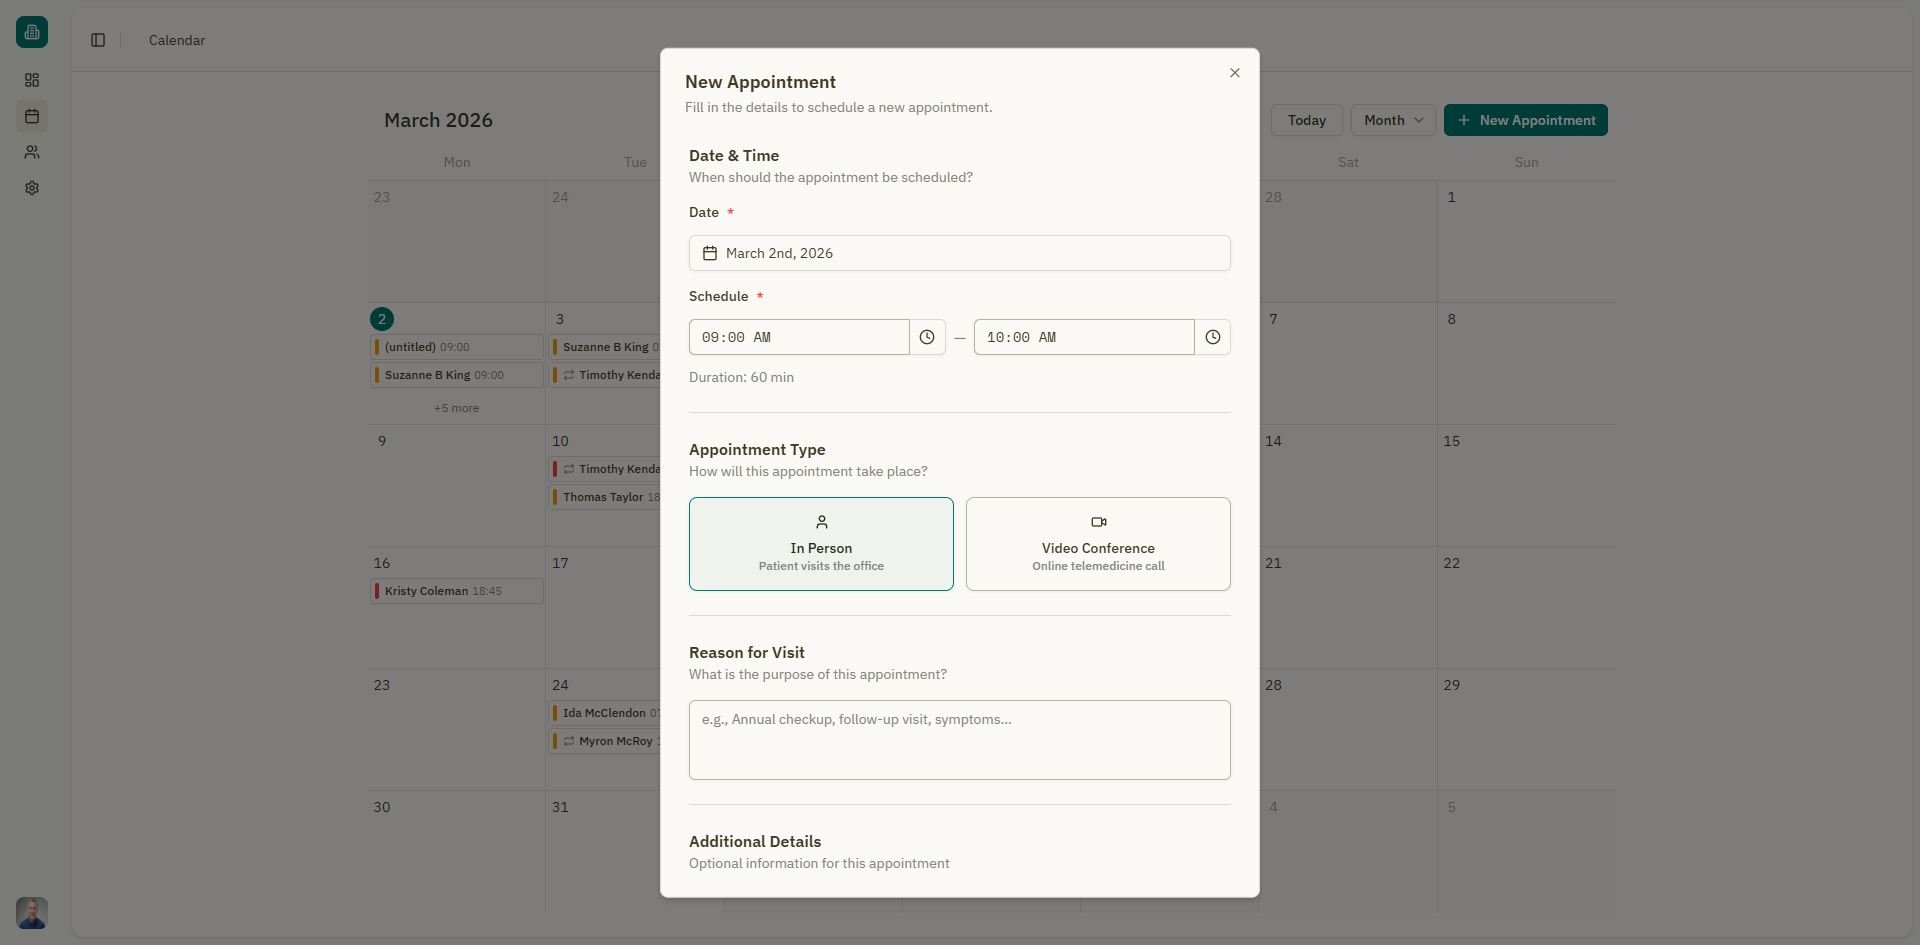
Step 3: Add a reason for the visit
In the "Reason for Visit" section, describe the purpose of the appointment. For example:
- Annual checkup
- Follow-up visit
- Symptoms evaluation
- Lab results review
This field is optional but recommended for reference when reviewing the calendar.
Step 4: Choose the appointment type
Select how the appointment will take place:
| Type | Description |
|---|---|
| In Person | Patient visits the office |
| Video Conference | Online telemedicine call via the built-in video meeting feature |
If you select Video Conference, a meeting link will be generated that you can share with the patient. See Video Meetings for details.
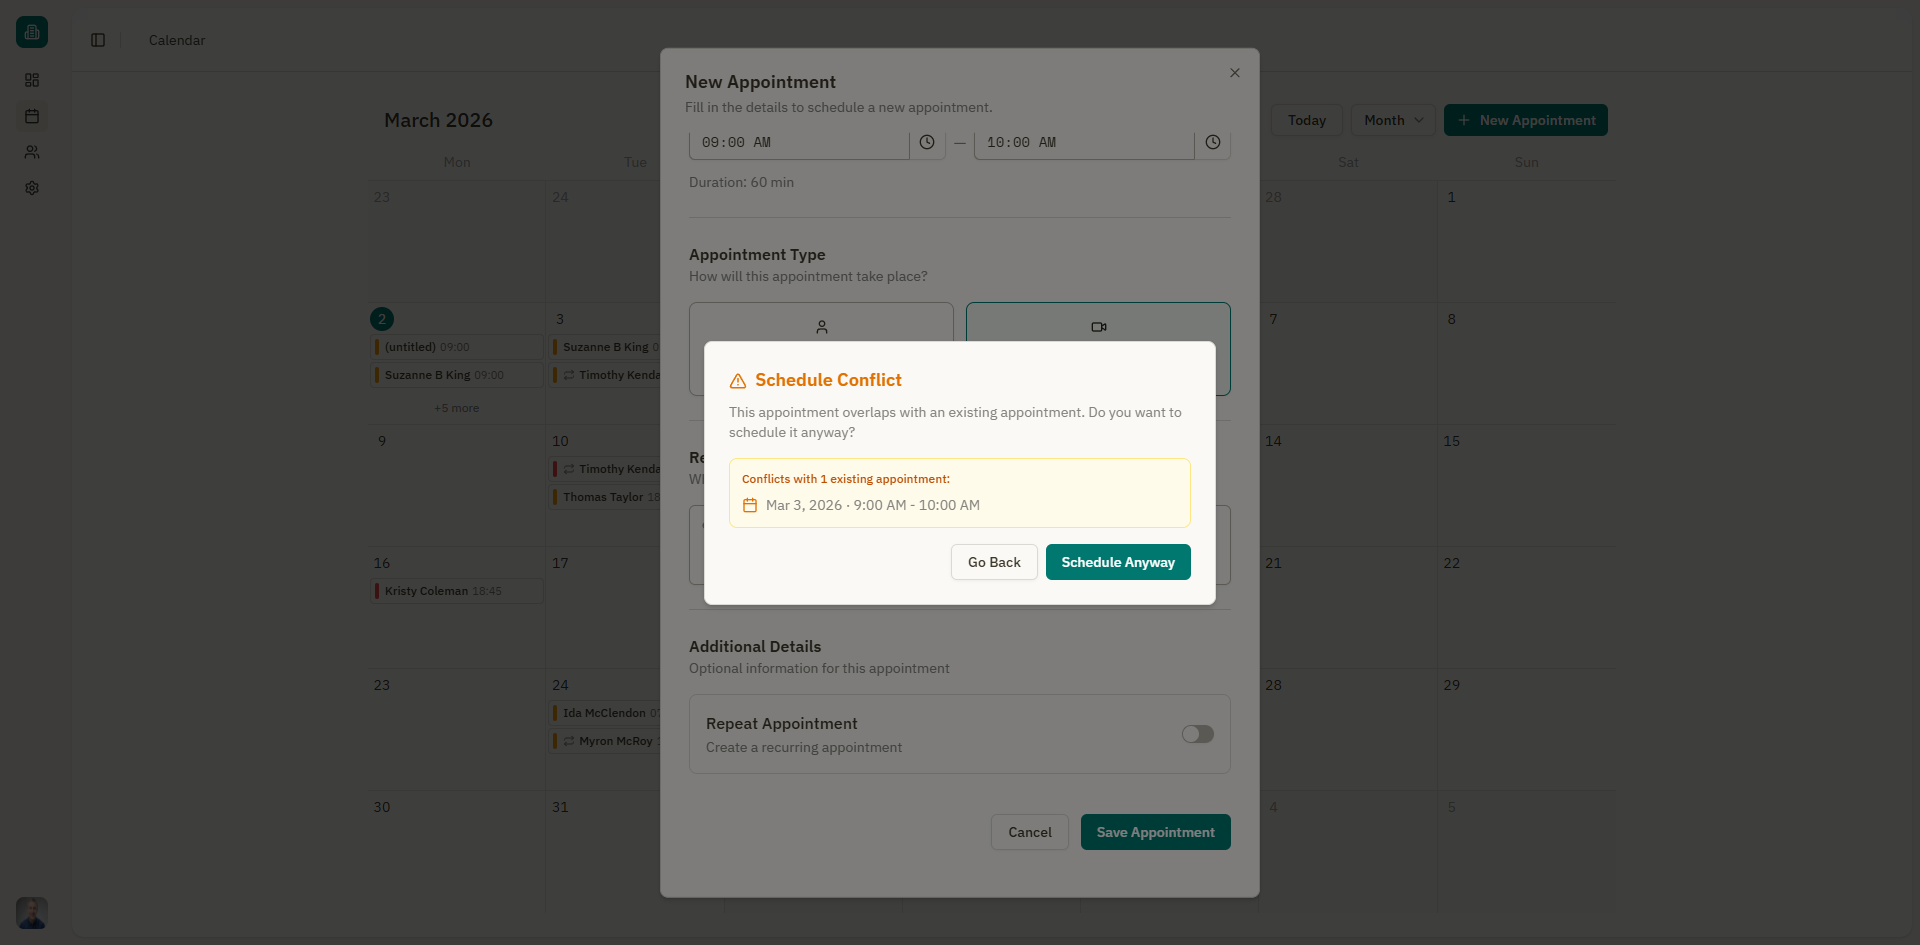
Step 5: Save the appointment
Review your entries and click "Save Appointment" to schedule it. The appointment will appear on the calendar immediately.
If the appointment overlaps with an existing one, a Schedule Conflict dialog appears:
- The dialog shows how many existing appointments conflict and their details.
- You can choose to "Schedule Anyway" to allow the overlap, or "Go Back" to adjust the time.
Setting the appointment status on creation
By default, new appointments are created with a Pending status. You can change the status before saving by clicking the "Mark as" button and selecting a different status:
- Pending
- Confirmed
Quick appointment creation from the calendar
In week or day view, you can click and drag on an empty time slot to quickly create an appointment. The date and time will be pre-filled based on where you clicked.