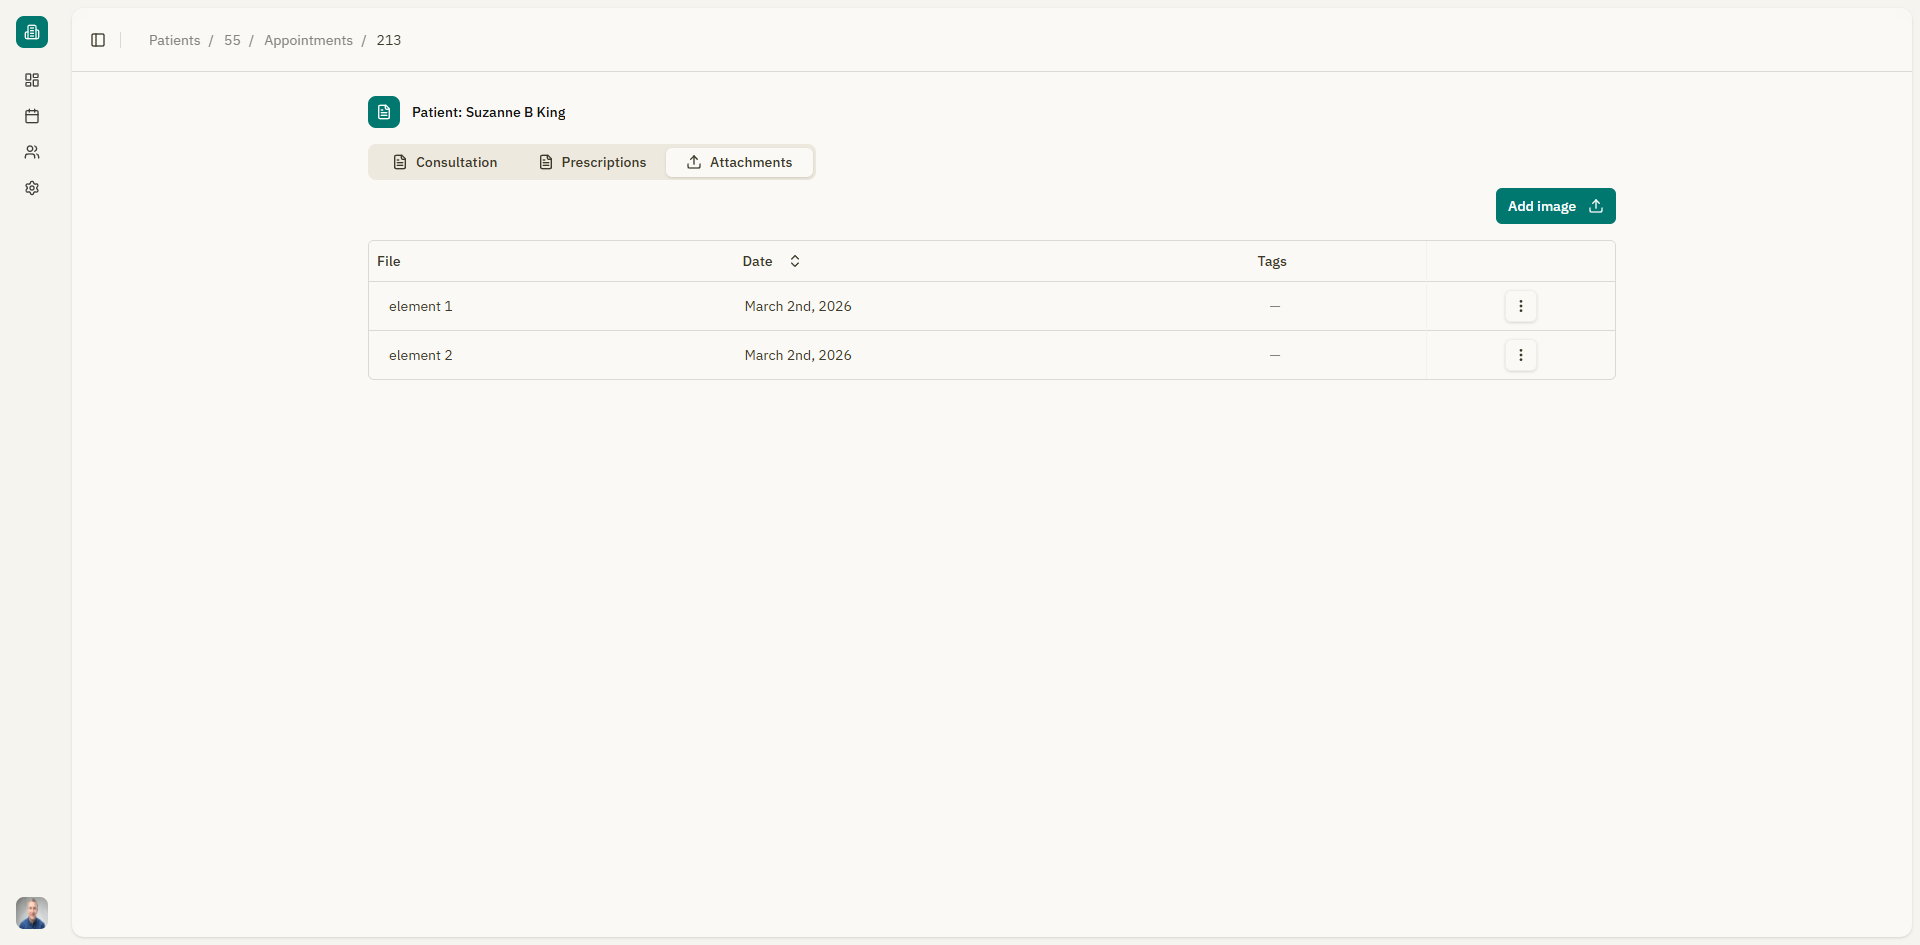
Attachments
The Attachments tab in the appointment details page allows you to upload, view, download, and delete files associated with a consultation. This is useful for storing lab results, imaging reports, referral letters, or any other documents.
Accessing attachments
- Open an appointment from the calendar or from a patient's appointment list.
- Click the "Attachments" tab.
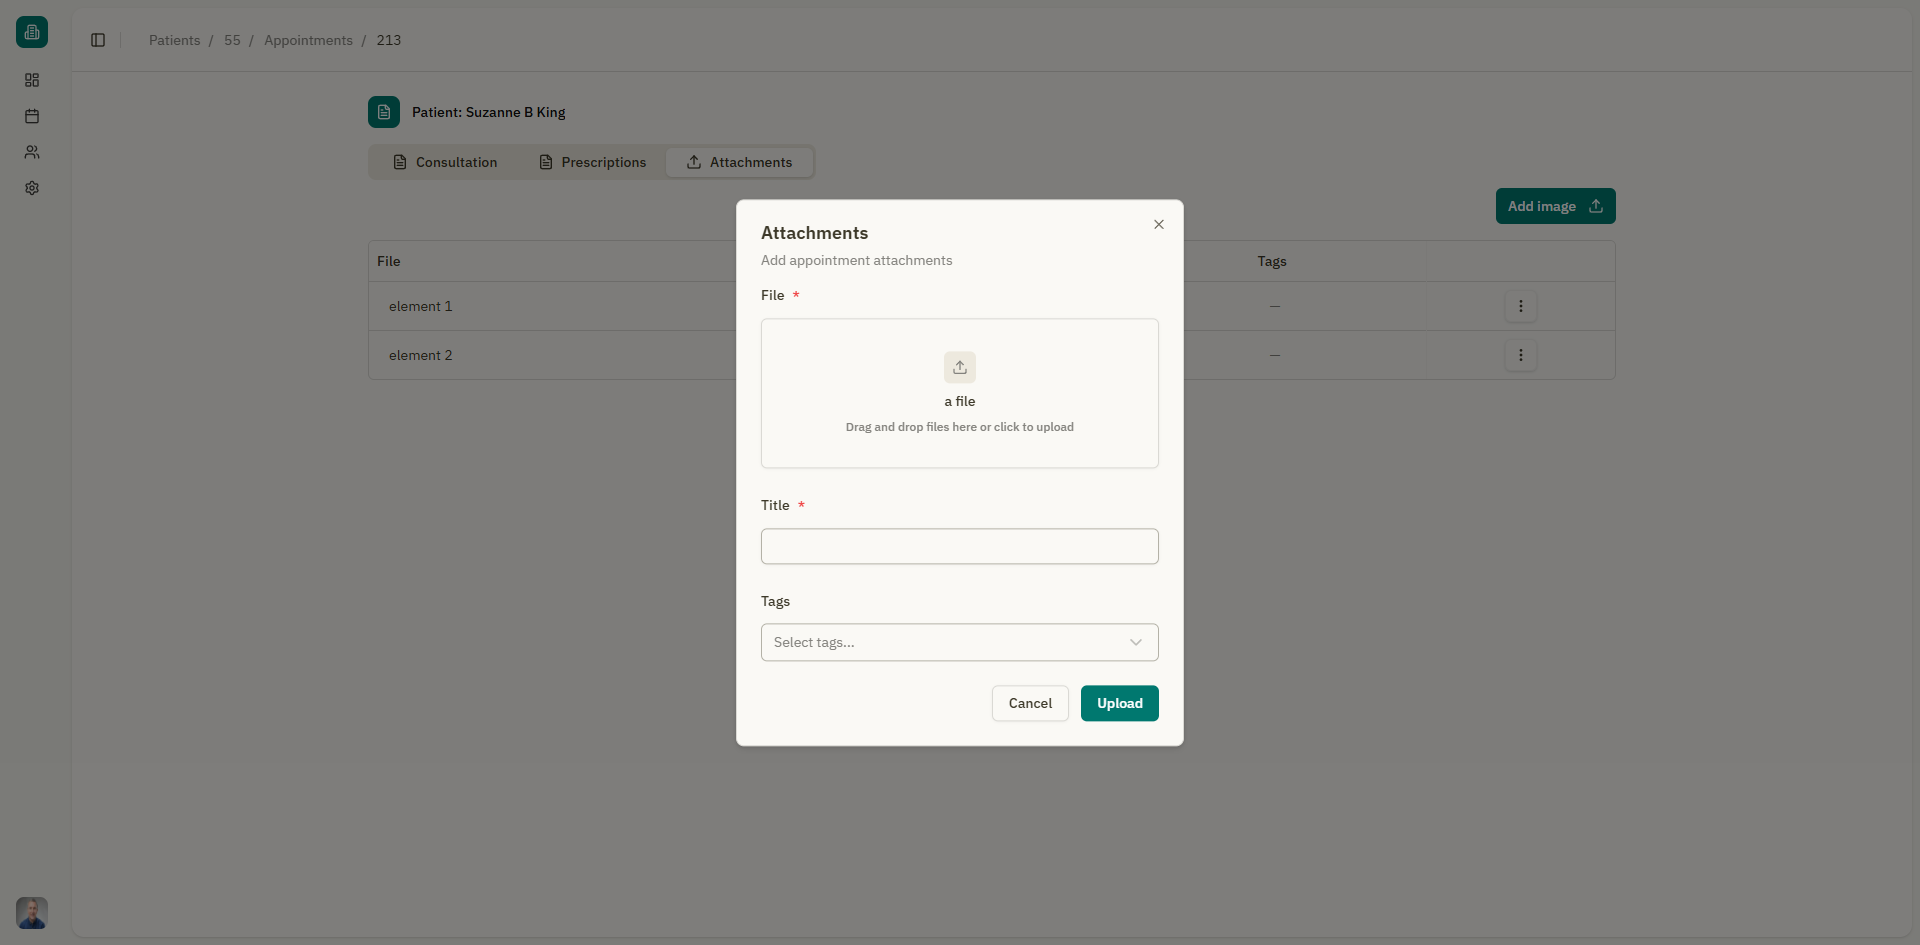
Uploading files
Drag and drop
- Open the Attachments tab.
- Drag files from your device and drop them onto the upload area.
- The file uploads automatically.
Click to upload
- Click on the upload area that says "Drag and drop files here or click to upload".
- A file picker opens. Select one or more files.
- The files upload automatically.
Accepted file types
The upload area displays the accepted file formats, which typically include:
- Images — PNG, JPG, JPEG, GIF
- Documents — PDF, Word (.docx), Excel (.xlsx), PowerPoint (.pptx)
File size limits are displayed in the upload area (e.g., "less than 10 MB").
Viewing attachments
Uploaded files are displayed in a list with the following information:
| Column | Description |
|---|---|
| Title | The file name |
| Tags | Tags associated with the file (if any) |
| Size | The file size |
| Upload date | When the file was uploaded |
| Actions | Download or delete |
Downloading files
To download an attached file:
- Click the "Download" button on the file row.
- The file downloads to your device.
- A notification confirms: "Downloaded".
Deleting files
To remove an attached file:
- Click the "Delete" button on the file row.
- A confirmation dialog appears: "Are you sure you want to delete this file?"
- Click "Delete" to confirm.
danger
Deleting an attachment is permanent and cannot be undone.

Empty state
If no files have been uploaded for the appointment, the tab shows: "No files attached" with the upload area ready for your first file.